Laravelで認証機能を実装するとても簡単な方法として「Laravel Breeze」という機能が用意されています。
ここでは「Laravel Breeze」を使って爆速でログイン機能を実装し、ログイン・ログアウトするところまでを実例で解説しています。
また、Laravel FortifyやLaravel Jetstreamとの違いについても触れています。
Laravelの認証機能(Laravel FortifyやLaravel Jetstreamとの違い)
Laravelには認証機能として「Laravel Breeze」の他に、「Laravel Fortify」や「Laravel Jetstream」とも用意されています。
それぞれ、認証に必要なファイルをまとめたパッケージですが、できることが異なります。
| パッケージ | 概要 | 内容 |
|---|---|---|
| Laravel Breeze | 最小限の全認証機能 | ログイン、登録、パスワードのリセット、電子メールの確認、パスワードの確認など |
| Laravel Fortify | ヘッドレス認証バックエンド | クッキーベースの認証や2要素認証、メールアドレス確認など |
| Laravel Jetstream | Laravel Fortifyの認証サービスを利用および公開 | 2要素認証、チームサポート、ブラウザセッション管理、プロファイル管理、およびAPIトークン認証など |
なお、これらのパッケージのことをスカフォールドといいます。
スカフォールド(scaffold)は足場という意味です。ここでは、骨組みとなるコードをひとまとめで提供してくれるパッケージを指しています。
「Laravel Breeze」「Laravel Fortify」「Laravel Jetstream」のどれを使うべきか?
認証機能が3つも用意してあると、「Laravel Breeze」「Laravel Fortify」「Laravel Jetstream」のどれを使うべき?という疑問がわくかもしれません。
もっとも機能が充実していて実用的なのは、Laravel Jetstreamです。
ただし、Laravel公式ページを見ると、まずはLaravel Breezeで認証機能の仕組みを知ることが推奨されています。
Laravel Breezeの使い方実例
ここでは、Laravelの認証機能の基本である「Laravel Breeze」をインストールして実際に使ってみます。
既存ファイルは上書きされてしまうため、新規プロジェクトでの実施を推奨します。
breezeのインストール(composer)
まずはcomposerを使ってbreezeのパッケージをインストールします。
composer require laravel/breeze --devbreezeのインストール(laravel)
続いて、アプリケーション(プロジェクト)の中にbrezeをインストールします。
$ php artisan breeze:install

Breeze scaffolding installed successfully.
Please execute the "npm install && npm run dev" command to build your assets.
上記のコマンドを実行すると一気に大量のファイルが変更・生成されます。
$ git st
On branch master
Changes not staged for commit:
  (use "git add <file>..." to update what will be committed)
  (use "git restore <file>..." to discard changes in working directory)
        modified:   app/Providers/RouteServiceProvider.php
        modified:   composer.json
        modified:   composer.lock
        modified:   package.json
        modified:   public/js/app.js
        modified:   resources/css/app.css
        modified:   resources/js/app.js
        modified:   resources/views/welcome.blade.php
        modified:   routes/web.php
        modified:   webpack.mix.js

Untracked files:
  (use "git add <file>..." to include in what will be committed)
        app/Http/Controllers/Auth/
        app/Http/Requests/Auth/
        app/View/
        resources/views/auth/
        resources/views/components/
        resources/views/dashboard.blade.php
        resources/views/layouts/
        routes/auth.php
        tailwind.config.js
        tests/Feature/AuthenticationTest.php
        tests/Feature/EmailVerificationTest.php
        tests/Feature/PasswordConfirmationTest.php
        tests/Feature/PasswordResetTest.php
        tests/Feature/RegistrationTest.php


追加されたパッケージのインストールとコンパイル
npm installでpackage.jsonに追記されたパッケージをインストールし、npm run devでコンパイルします。
▼パッケージのインストール
$ npm install

added 38 packages from 58 contributors and audited 1230 packages in 5.577s
▼コンパイルの実行
$ npm run devログインページ
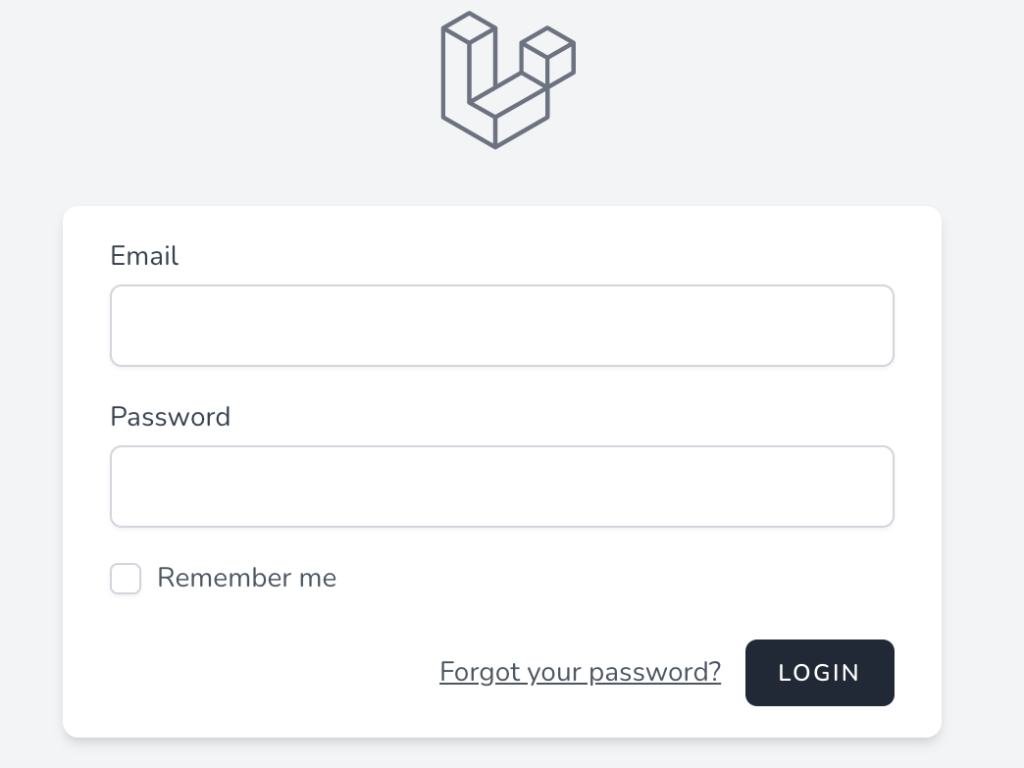
以上の処理でログインページが出来上がっています。
サイトにアクセスします。http://localhost:8000/login

DBテーブルの作成
ログイン機能を使うためには、EmailやPasswordを保存するための、データベース上のテーブルが必要です。
既にマイグレーションファイルは作成されているので、マイグレーションを実行します。
php artisan migrateなお、データベース上にテーブルが作成できても、現状ではユーザー情報がないためログインできません。
ユーザー情報の追加
ユーザー情報を保存できるようになっているので、以下ページからユーザー情報を登録します。

ログイン
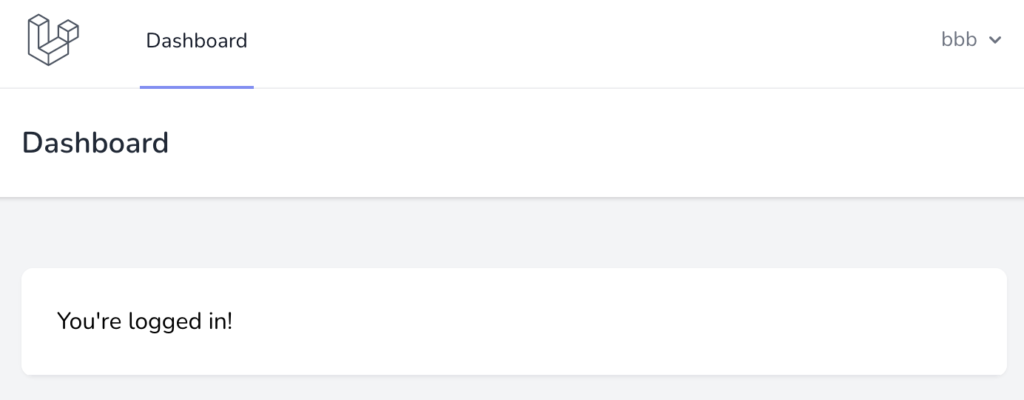
先ほど登録した情報でログインします。ログインページは以下です。

すると「You’re logged in!」と表示されます。

指定したユーザーで無事ログインできていることがわかります。
以上でLaravel Breezeによる認証機能の実装と確認は完了です。
注意点:MySQL経由で直接登録したユーザー情報ではログインできない
なお、Laravel経由ではなく、MySQL経由で直接登録したユーザー情報ではログインできないので注意してください。
実例
ユーザーcccをMySQL経由で直接登録します。
mysql> INSERT INTO users (name, email, password) VALUES ('ccc', 'ccc@gmail', 'xxxxyyyy');
Query OK, 1 row affected (0.00 sec)

mysql> select * from users;
+----+--------+------------------+-------------------+--------------------------------------------------------------+----------------+---------------------+---------------------+
| id | name   | email            | email_verified_at | password                                                     | remember_token | created_at          | updated_at          |
+----+--------+------------------+-------------------+--------------------------------------------------------------+----------------+---------------------+---------------------+
|  1 | bbb    | bbb@gmail        | NULL              | $2y$10$p7SHKmc/ATBwm6eFAB2bCecW/7I/aTi1dGTPxuK/QoqR3sf3VuYUO | NULL           | 2021-02-08 10:34:47 | 2021-02-08 10:34:47 |
|  2 | ccc    | ccc@gmail        | NULL              | xxxxyyyy                                                     | NULL           | NULL                | NULL                |
+----+--------+------------------+-------------------+--------------------------------------------------------------+----------------+---------------------+---------------------+
5 rows in set (0.00 sec)
Laravelから登録した bbb@gmail ではログインできましたが、MySQL経由で直接登録 ccc@gmail ではログインできません。
以下のように表示されます。
Whoops! Something went wrong.
These credentials do not match our records.
認証の流れまとめ
Laravel Breezeなど一般的な認証システムの流れは以下のようになっています。
- ログインフォーム(ユーザーが入力)
- セッションに情報を保存(サーバー)
- クッキーにセッションIDが入っている(ブラウザ)
- クッキーのセッションIDと照らし合わせ(アプリケーション)
なお、APIを使う場合は、リクエスト毎にAPIトークンを送信して認証を行います。(APIの場合クッキーがないため)
(補足)仕組みの確認
ルーティング
認証関連のルーティングが自動生成されています。
・$ php artisan route:list
$ php artisan route:list

+--------+----------+---------------------------------+---------------------+-------------------------------------------------------------------------+--------------+
| Domain | Method   | URI                             | Name                | Action                                                                  | Middleware   |
+--------+----------+---------------------------------+---------------------+-------------------------------------------------------------------------+--------------+
|        | GET|HEAD | /                               |                     | Closure                                                                 | web          |
|        | GET|HEAD | api/user                        |                     | Closure                                                                 | api          |
|        |          |                                 |                     |                                                                         | auth:api     |
|        | POST     | confirm-password                |                     | App\Http\Controllers\Auth\ConfirmablePasswordController@store           | web          |
|        |          |                                 |                     |                                                                         | auth         |
|        | GET|HEAD | confirm-password                | password.confirm    | App\Http\Controllers\Auth\ConfirmablePasswordController@show            | web          |
|        |          |                                 |                     |                                                                         | auth         |
|        | GET|HEAD | dashboard                       | dashboard           | Closure                                                                 | web          |
|        |          |                                 |                     |                                                                         | auth         |
|        | POST     | email/verification-notification | verification.send   | App\Http\Controllers\Auth\EmailVerificationNotificationController@store | web          |
|        |          |                                 |                     |                                                                         | auth         |
|        |          |                                 |                     |                                                                         | throttle:6,1 |
|        | POST     | forgot-password                 | password.email      | App\Http\Controllers\Auth\PasswordResetLinkController@store             | web          |
|        |          |                                 |                     |                                                                         | guest        |
|        | GET|HEAD | forgot-password                 | password.request    | App\Http\Controllers\Auth\PasswordResetLinkController@create            | web          |
|        |          |                                 |                     |                                                                         | guest        |
|        | POST     | login                           |                     | App\Http\Controllers\Auth\AuthenticatedSessionController@store          | web          |
|        |          |                                 |                     |                                                                         | guest        |
|        | GET|HEAD | login                           | login               | App\Http\Controllers\Auth\AuthenticatedSessionController@create         | web          |
|        |          |                                 |                     |                                                                         | guest        |
|        | POST     | logout                          | logout              | App\Http\Controllers\Auth\AuthenticatedSessionController@destroy        | web          |
|        |          |                                 |                     |                                                                         | auth         |
|        | POST     | register                        |                     | App\Http\Controllers\Auth\RegisteredUserController@store                | web          |
|        |          |                                 |                     |                                                                         | guest        |
|        | GET|HEAD | register                        | register            | App\Http\Controllers\Auth\RegisteredUserController@create               | web          |
|        |          |                                 |                     |                                                                         | guest        |
|        | POST     | reset-password                  | password.update     | App\Http\Controllers\Auth\NewPasswordController@store                   | web          |
|        |          |                                 |                     |                                                                         | guest        |
|        | GET|HEAD | reset-password/{token}          | password.reset      | App\Http\Controllers\Auth\NewPasswordController@create                  | web          |
|        |          |                                 |                     |                                                                         | guest        |
|        | GET|HEAD | verify-email                    | verification.notice | App\Http\Controllers\Auth\EmailVerificationPromptController@__invoke    | web          |
|        |          |                                 |                     |                                                                         | auth         |
|        | GET|HEAD | verify-email/{id}/{hash}        | verification.verify | App\Http\Controllers\Auth\VerifyEmailController@__invoke                | web          |
|        |          |                                 |                     |                                                                         | auth         |
|        |          |                                 |                     |                                                                         | signed       |
|        |          |                                 |                     |                                                                         | throttle:6,1 |
+--------+----------+---------------------------------+---------------------+-------------------------------------------------------------------------+--------------+URI/loginにGETでアクセスするとApp\Http\Controllers\Auth\AuthenticatedSessionController@createが実行さます。
ルーティングの詳細
web.phpを見ると記述はシンプルです。
(1)トップページ、(2)dashboardページ、(3)auth.appから読み込みの3つのルーティングが設定されています。
Route::get('/', function () {
    return view('welcome');
});

Route::get('/dashboard', function () {
    return view('dashboard');
})->middleware(['auth'])->name('dashboard');

require __DIR__.'/auth.php';
なお主なルーティングはauth.phpに記述されています。
require __DIR__.'/auth.php';require DIR.’/auth.php’;の内容
・require ファイルパス: 指定したファイルを読み込み
・__DIR__ : ファイルのディレクトリパスを表示する。(※末尾のスラッシュは含まない)
なので、web.phpと同じディレクトリにあるauth.phpを読み込んでいる。
(参考)__DIR__ マジカル定数
<?php

use App\Http\Controllers\Auth\AuthenticatedSessionController;
use App\Http\Controllers\Auth\ConfirmablePasswordController;
use App\Http\Controllers\Auth\EmailVerificationNotificationController;
use App\Http\Controllers\Auth\EmailVerificationPromptController;
use App\Http\Controllers\Auth\NewPasswordController;
use App\Http\Controllers\Auth\PasswordResetLinkController;
use App\Http\Controllers\Auth\RegisteredUserController;
use App\Http\Controllers\Auth\VerifyEmailController;
use Illuminate\Support\Facades\Route;

Route::get('/register', [RegisteredUserController::class, 'create'])
                ->middleware('guest')
                ->name('register');

Route::post('/register', [RegisteredUserController::class, 'store'])
                ->middleware('guest');

Route::get('/login', [AuthenticatedSessionController::class, 'create'])
                ->middleware('guest')
                ->name('login');

Route::post('/login', [AuthenticatedSessionController::class, 'store'])
                ->middleware('guest');

Route::get('/forgot-password', [PasswordResetLinkController::class, 'create'])
                ->middleware('guest')
                ->name('password.request');

Route::post('/forgot-password', [PasswordResetLinkController::class, 'store'])
                ->middleware('guest')
                ->name('password.email');

Route::get('/reset-password/{token}', [NewPasswordController::class, 'create'])
                ->middleware('guest')
                ->name('password.reset');

Route::post('/reset-password', [NewPasswordController::class, 'store'])
                ->middleware('guest')
                ->name('password.update');

Route::get('/verify-email', [EmailVerificationPromptController::class, '__invoke'])
                ->middleware('auth')
                ->name('verification.notice');

Route::get('/verify-email/{id}/{hash}', [VerifyEmailController::class, '__invoke'])
                ->middleware(['auth', 'signed', 'throttle:6,1'])
                ->name('verification.verify');

Route::post('/email/verification-notification', [EmailVerificationNotificationController::class, 'store'])
                ->middleware(['auth', 'throttle:6,1'])
                ->name('verification.send');

Route::get('/confirm-password', [ConfirmablePasswordController::class, 'show'])
                ->middleware('auth')
                ->name('password.confirm');

Route::post('/confirm-password', [ConfirmablePasswordController::class, 'store'])
                ->middleware('auth');

Route::post('/logout', [AuthenticatedSessionController::class, 'destroy'])
                ->middleware('auth')
                ->name('logout');
URI/loginにアクセスするとAuthenticatedSessionControllerのcreate関数が実行されます。
ミドルウェア(バリデーション)としてguestが実行されます。ルート名はloginです。
Route::get('/login', [AuthenticatedSessionController::class, 'create'])
                ->middleware('guest')
                ->name('login');
ミドルウェア(guest)
ミドルウェアをすべてのHTTPリクエストに対して実行したい場合は、app/Http/Kernel.phpの$routeMiddlewareプロパティに追加しています。

    protected $routeMiddleware = [
        'auth' => \App\Http\Middleware\Authenticate::class,
        'auth.basic' => \Illuminate\Auth\Middleware\AuthenticateWithBasicAuth::class,
        'cache.headers' => \Illuminate\Http\Middleware\SetCacheHeaders::class,
        'can' => \Illuminate\Auth\Middleware\Authorize::class,
        'guest' => \App\Http\Middleware\RedirectIfAuthenticated::class,
        'password.confirm' => \Illuminate\Auth\Middleware\RequirePassword::class,
        'signed' => \Illuminate\Routing\Middleware\ValidateSignature::class,
        'throttle' => \Illuminate\Routing\Middleware\ThrottleRequests::class,
        'verified' => \Illuminate\Auth\Middleware\EnsureEmailIsVerified::class,
    ];
guestミドルウェアが指定された場合は以下が実行されます。
\App\Http\Middleware\RedirectIfAuthenticated::class,RedirectIfAuthenticated::class

<?php

namespace App\Http\Middleware;

use App\Providers\RouteServiceProvider;
use Closure;
use Illuminate\Http\Request;
use Illuminate\Support\Facades\Auth;

class RedirectIfAuthenticated
{
    /**
     * Handle an incoming request.
     *
     * @param  \Illuminate\Http\Request  $request
     * @param  \Closure  $next
     * @param  string|null  ...$guards
     * @return mixed
     */
    public function handle(Request $request, Closure $next, ...$guards)
    {
        $guards = empty($guards) ? [null] : $guards;

        foreach ($guards as $guard) {
            if (Auth::guard($guard)->check()) {
                return redirect(RouteServiceProvider::HOME);
            }
        }

        return $next($request);
    }
}
コントローラ(AuthenticatedSessionController)
URI/loginにGETでアクセスすると、create関数が実行され、auth/loginビューが開きます。
<?php

namespace App\Http\Controllers\Auth;

use App\Http\Controllers\Controller;
use App\Http\Requests\Auth\LoginRequest;
use App\Providers\RouteServiceProvider;
use Illuminate\Http\Request;
use Illuminate\Support\Facades\Auth;

class AuthenticatedSessionController extends Controller
{
    /**
     * Display the login view.
     *
     * @return \Illuminate\View\View
     */
    public function create()
    {
        return view('auth.login');
    }
loginビュー(日本語化やログインに必要な情報の変更)
login.blade.phpの内容
/loginページはlogin.blade.phpの内容が表示されています。
この中身を変更すれば日本語化したり、ログインに必要な情報を変更できます。
<x-guest-layout>
    <x-auth-card>
        <x-slot name="logo">
            <a href="/">
                <x-application-logo class="w-20 h-20 fill-current text-gray-500" />
            </a>
        </x-slot>

        <!-- Session Status -->
        <x-auth-session-status class="mb-4" :status="session('status')" />

        <!-- Validation Errors -->
        <x-auth-validation-errors class="mb-4" :errors="$errors" />

        <form method="POST" action="{{ route('login') }}">
            @csrf

            <!-- Email Address -->
            <div>
                <x-label for="email" :value="__('Email')" />

                <x-input id="email" class="block mt-1 w-full" type="email" name="email" :value="old('email')" required autofocus />
            </div>

            <!-- Password -->
            <div class="mt-4">
                <x-label for="password" :value="__('Password')" />

                <x-input id="password" class="block mt-1 w-full"
                                type="password"
                                name="password"
                                required autocomplete="current-password" />
            </div>

            <!-- Remember Me -->
            <div class="block mt-4">
                <label for="remember_me" class="inline-flex items-center">
                    <input id="remember_me" type="checkbox" class="rounded border-gray-300 text-indigo-600 shadow-sm focus:border-indigo-300 focus:ring focus:ring-indigo-200 focus:ring-opacity-50" name="remember">
                    <span class="ml-2 text-sm text-gray-600">{{ __('Remember me') }}</span>
                </label>
            </div>

            <div class="flex items-center justify-end mt-4">
                @if (Route::has('password.request'))
                    <a class="underline text-sm text-gray-600 hover:text-gray-900" href="{{ route('password.request') }}">
                        {{ __('Forgot your password?') }}
                    </a>
                @endif

                <x-button class="ml-3">
                    {{ __('Login') }}
                </x-button>
            </div>
        </form>
    </x-auth-card>
</x-guest-layout>表示するテキストは__ヘルパ関数を使っている。langファイルに記述すればそのデータを表示できます。もちろんこのビューに直接記述しても問題ありません。
日本語化の実例

(参考)__ヘルパ関数の使い方
x- コンポーネント
loginビューの中で使われている、x-guest-layout, x-auth-card, x-slot, x-application-logoなどx-がついているタグはコンポーネントです。
コンポーネントの登録方法は2つあります。
- App/View/Components
- resources/views/components
App/View/Components
x-guest-layoutとx-app-layoutが該当します。

例えば、x-guest-layoutの場合、クラス名GuestLayoutと対応しています。
<?php

namespace App\View\Components;

use Illuminate\View\Component;

class GuestLayout extends Component
{
    /**
     * Get the view / contents that represents the component.
     *
     * @return \Illuminate\View\View
     */
    public function render()
    {
        return view('layouts.guest');
    }
}
クラスGuestLayoutはComponentクラスを拡張しています。
resources/views/components
x-auth-card, x-slot, x-application-logoなどはビューディレクトリ配下に保存されています。

タグ名はファイル名と連動しています。例えば、x-auth-cardであれば、ファイル名auth-card.blade.phpの内容が表示されます。
<div class="min-h-screen flex flex-col sm:justify-center items-center pt-6 sm:pt-0 bg-gray-100">
    <div>
        {{ $logo }}
    </div>

    <div class="w-full sm:max-w-md mt-6 px-6 py-4 bg-white shadow-md overflow-hidden sm:rounded-lg">
        {{ $slot }}
    </div>
</div>(補足)Larvel公式 コンポーネント
バリデーション
ログインフォームでe-mailとpasswordのバリデーションをしています。
この処理は App > Http > Requests > Auth > LoginRequest.php で行っています。
<?php

namespace App\Http\Requests\Auth;

use Illuminate\Auth\Events\Lockout;
use Illuminate\Foundation\Http\FormRequest;
use Illuminate\Support\Facades\Auth;
use Illuminate\Support\Facades\RateLimiter;
use Illuminate\Support\Str;
use Illuminate\Validation\ValidationException;

class LoginRequest extends FormRequest
{
    /**
     * Determine if the user is authorized to make this request.
     *
     * @return bool
     */
    public function authorize()
    {
        return true;
    }

    /**
     * Get the validation rules that apply to the request.
     *
     * @return array
     */
    public function rules()
    {
        return [
            'email' => 'required|string|email',
            'password' => 'required|string',
        ];
    }

    /**
     * Attempt to authenticate the request's credentials.
     *
     * @return void
     *
     * @throws \Illuminate\Validation\ValidationException
     */
    public function authenticate()
    {
        $this->ensureIsNotRateLimited();

        if (! Auth::attempt($this->only('email', 'password'), $this->filled('remember'))) {
            RateLimiter::hit($this->throttleKey());

            throw ValidationException::withMessages([
                'email' => __('auth.failed'),
            ]);
        }

        RateLimiter::clear($this->throttleKey());
    }

    /**
     * Ensure the login request is not rate limited.
     *
     * @return void
     *
     * @throws \Illuminate\Validation\ValidationException
     */
    public function ensureIsNotRateLimited()
    {
        if (! RateLimiter::tooManyAttempts($this->throttleKey(), 5)) {
            return;
        }

        event(new Lockout($this));

        $seconds = RateLimiter::availableIn($this->throttleKey());

        throw ValidationException::withMessages([
            'email' => trans('auth.throttle', [
                'seconds' => $seconds,
                'minutes' => ceil($seconds / 60),
            ]),
        ]);
    }

    /**
     * Get the rate limiting throttle key for the request.
     *
     * @return string
     */
    public function throttleKey()
    {
        return Str::lower($this->input('email')).'|'.$this->ip();
    }
}
Laravel8.x以前はLoginControllerだったが、LoginRequestに変更になっています。
(参考)Laravel Authentication customize
登録機能
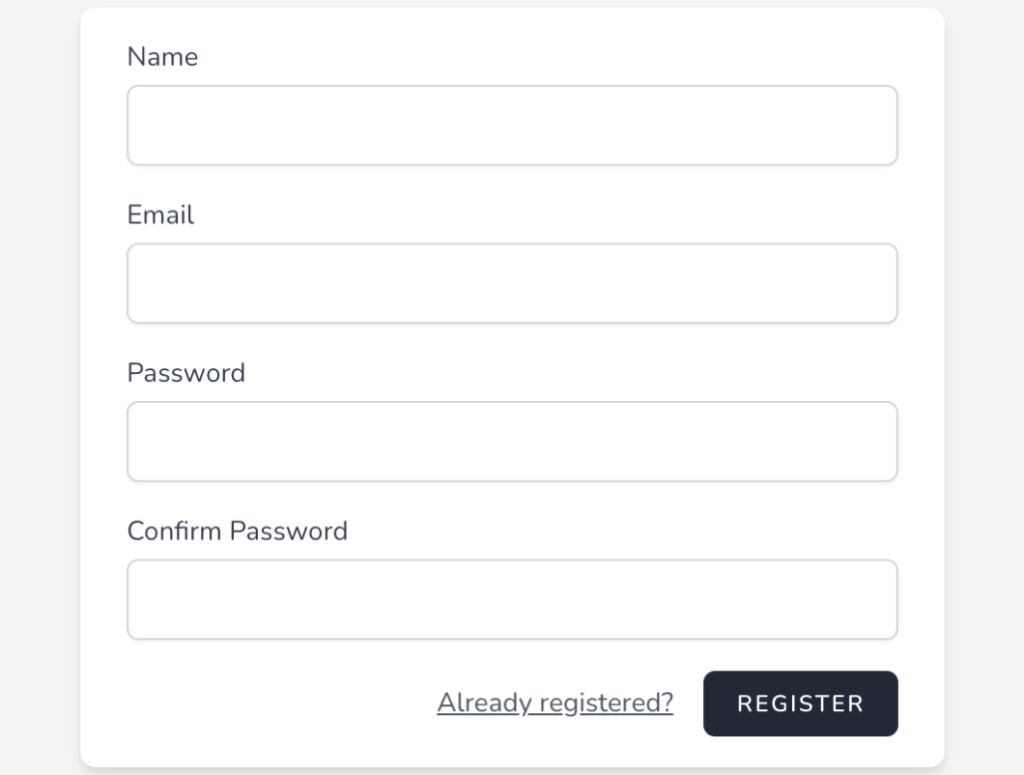
http://localhost:8000/register にアクセスすると登録画面が表示されます。

$ php artisan route:list

+--------+----------+---------------------------------+---------------------+-------------------------------------------------------------------------+--------------+
| Domain | Method   | URI                             | Name                | Action                                                                  | Middleware   |
+--------+----------+---------------------------------+---------------------+-------------------------------------------------------------------------+--------------+
|        | POST     | register                        |                     | App\Http\Controllers\Auth\RegisteredUserController@store                | web          |
|        |          |                                 |                     |                                                                         | guest        |
|        | GET|HEAD | register                        | register            | App\Http\Controllers\Auth\RegisteredUserController@create               | web          |
|        |          |                                 |                     |                                                                         | guest        |
+--------+----------+---------------------------------+---------------------+-------------------------------------------------------------------------+--------------+
resigerページにGETでアクセスすればRegisteredUserControllerのcreateアクションが、POSTでアクセスすればstoreアクションが実行されます。
GETでアクセスした場合
RegisteredUserController.phpのcreateアクションが対応します。
<?php

namespace App\Http\Controllers\Auth;

use App\Http\Controllers\Controller;
use App\Models\User;
use App\Providers\RouteServiceProvider;
use Illuminate\Auth\Events\Registered;
use Illuminate\Http\Request;
use Illuminate\Support\Facades\Auth;
use Illuminate\Support\Facades\Hash;

class RegisteredUserController extends Controller
{
    /**
     * Display the registration view.
     *
     * @return \Illuminate\View\View
     */
    public function create()
    {
        return view('auth.register');
    }
auth/register.blade.phpを表示します。
<x-guest-layout>
    <x-auth-card>
        <x-slot name="logo">
            <a href="/">
                <x-application-logo class="w-20 h-20 fill-current text-gray-500" />
            </a>
        </x-slot>

        <!-- Validation Errors -->
        <x-auth-validation-errors class="mb-4" :errors="$errors" />

        <form method="POST" action="{{ route('register') }}">
            @csrf

            <!-- Name -->
            <div>
                <x-label for="name" :value="__('Name')" />

                <x-input id="name" class="block mt-1 w-full" type="text" name="name" :value="old('name')" required autofocus />
            </div>

            <!-- Email Address -->
            <div class="mt-4">
                <x-label for="email" :value="__('Email')" />

                <x-input id="email" class="block mt-1 w-full" type="email" name="email" :value="old('email')" required />
            </div>

            <!-- Password -->
            <div class="mt-4">
                <x-label for="password" :value="__('Password')" />

                <x-input id="password" class="block mt-1 w-full"
                                type="password"
                                name="password"
                                required autocomplete="new-password" />
            </div>

            <!-- Confirm Password -->
            <div class="mt-4">
                <x-label for="password_confirmation" :value="__('Confirm Password')" />

                <x-input id="password_confirmation" class="block mt-1 w-full"
                                type="password"
                                name="password_confirmation" required />
            </div>

            <div class="flex items-center justify-end mt-4">
                <a class="underline text-sm text-gray-600 hover:text-gray-900" href="{{ route('login') }}">
                    {{ __('Already registered?') }}
                </a>

                <x-button class="ml-4">
                    {{ __('Register') }}
                </x-button>
            </div>
        </form>
    </x-auth-card>
</x-guest-layout>
POSTでアクセスした場合
RegisteredUserControllerのstoreアクションが実行されます。
    /**
     * Handle an incoming registration request.
     *
     * @param  \Illuminate\Http\Request  $request
     * @return \Illuminate\Http\RedirectResponse
     *
     * @throws \Illuminate\Validation\ValidationException
     */
    public function store(Request $request)
    {
        $request->validate([
            'name' => 'required|string|max:255',
            'email' => 'required|string|email|max:255|unique:users',
            'password' => 'required|string|confirmed|min:8',
        ]);

        Auth::login($user = User::create([
            'name' => $request->name,
            'email' => $request->email,
            'password' => Hash::make($request->password),
        ]));

        event(new Registered($user));

        return redirect(RouteServiceProvider::HOME);
    }
渡されたデータのバリデーション
        $request->validate([
            'name' => 'required|string|max:255',
            'email' => 'required|string|email|max:255|unique:users',
            'password' => 'required|string|confirmed|min:8',
        ]);
ユーザー登録とログイン
        Auth::login($user = User::create([
            'name' => $request->name,
            'email' => $request->email,
            'password' => Hash::make($request->password),
]));・Auth::login($user, [true])
Authファサードのlogin($user)メソッドを使うと、指定したユーザーでログインすることができる。
第2引数でtrueを指定すると、Rememberにする。
引数の中で、Userファサードのcreateメソッドを使い、ユーザー情報を登録している。
・Hash::make()
Hashファサードのmakeメソッドを使うとハッシュ値を作成できる。
登録完了メールの送信(イベント)
eventヘルパを使って登録したユーザー情報を元にメールを自動送信するイベントを設定しています。
event(new Registered($user));イベント情報はProvidersのEventServiceProviderに記述してあります。
<?php

namespace App\Providers;

use Illuminate\Auth\Events\Registered;
use Illuminate\Auth\Listeners\SendEmailVerificationNotification;
use Illuminate\Foundation\Support\Providers\EventServiceProvider as ServiceProvider;
use Illuminate\Support\Facades\Event;

class EventServiceProvider extends ServiceProvider
{
    /**
     * The event listener mappings for the application.
     *
     * @var array
     */
    protected $listen = [
        Registered::class => [
            SendEmailVerificationNotification::class,
        ],
    ];

    /**
     * Register any events for your application.
     *
     * @return void
     */
    public function boot()
    {
        //
    }
}$listenの中にイベントを設定しています。
    protected $listen = [
        イベント名::class => [
            実行するイベント名::class,
        ],
    ];
・イベント名: Registered
・実行するイベント名: SendEmailVerificationNotification
実行するイベントは、冒頭で呼び出されています。
use Illuminate\Auth\Listeners\SendEmailVerificationNotification;vender > laravel > framework > src > Illuminate > Auth > SendEmailVerificationNotification.php

<?php

namespace Illuminate\Auth\Listeners;

use Illuminate\Auth\Events\Registered;
use Illuminate\Contracts\Auth\MustVerifyEmail;

class SendEmailVerificationNotification
{
    /**
     * Handle the event.
     *
     * @param  \Illuminate\Auth\Events\Registered  $event
     * @return void
     */
    public function handle(Registered $event)
    {
        if ($event->user instanceof MustVerifyEmail && ! $event->user->hasVerifiedEmail()) {
            $event->user->sendEmailVerificationNotification();
        }
    }
}
条件式1
$event->user instanceof MustVerifyEmail・インスタンス instance of クラス名
指定したインスタンスが、指定したクラスのインスタンスか調べる。
$eventのuserインスタンスが、MustVerifyEmailクラスのものか確認。
条件式2
! $event->user->hasVerifiedEmail()・hasVerifiedEmail()
MustVerifyEmailで定義されたメソッド。カラムに情報があるか調べる。なければtrueを返す。
    public function hasVerifiedEmail()
    {
        return ! is_null($this->email_verified_at);
}・is_nullメソッド
指定した値がnullか調べる。nullならtrueを返す。
冒頭に!があるため、ここではnull以外ならtrueとなる。
・email_verified_at
userテーブルのカラム名。指定したカラムの値(timestamp)があればtureとなる。
MustVerifyEmailクラスの sendEmailVerificationNotification関数
vender > laravel > framework > src > Illuminate > Auth > MustVerifyEmail.php
use Illuminate\Auth\Notifications\VerifyEmail;

    /**
     * Send the email verification notification.
     *
     * @return void
     */
    public function sendEmailVerificationNotification()
    {
        $this->notify(new VerifyEmail);
}・notify(通知インスタンス)
Illuminate\Auth\Notifications\VerifyEmailトレイトのnotifyメソッドで通知を行う。

<?php

namespace Illuminate\Auth\Notifications;

use Illuminate\Notifications\Messages\MailMessage;
use Illuminate\Notifications\Notification;
use Illuminate\Support\Carbon;
use Illuminate\Support\Facades\Config;
use Illuminate\Support\Facades\Lang;
use Illuminate\Support\Facades\URL;

class VerifyEmail extends Notification
{
    /**
     * The callback that should be used to create the verify email URL.
     *
     * @var \Closure|null
     */
    public static $createUrlCallback;

    /**
     * The callback that should be used to build the mail message.
     *
     * @var \Closure|null
     */
    public static $toMailCallback;

    /**
     * Get the notification's channels.
     *
     * @param  mixed  $notifiable
     * @return array|string
     */
    public function via($notifiable)
    {
        return ['mail'];
    }

    /**
     * Build the mail representation of the notification.
     *
     * @param  mixed  $notifiable
     * @return \Illuminate\Notifications\Messages\MailMessage
     */
    public function toMail($notifiable)
    {
        $verificationUrl = $this->verificationUrl($notifiable);

        if (static::$toMailCallback) {
            return call_user_func(static::$toMailCallback, $notifiable, $verificationUrl);
        }

        return $this->buildMailMessage($verificationUrl);
    }

    /**
     * Get the verify email notification mail message for the given URL.
     *
     * @param  string  $url
     * @return \Illuminate\Notifications\Messages\MailMessage
     */
    protected function buildMailMessage($url)
    {
        return (new MailMessage)
            ->subject(Lang::get('Verify Email Address'))
            ->line(Lang::get('Please click the button below to verify your email address.'))
            ->action(Lang::get('Verify Email Address'), $url)
            ->line(Lang::get('If you did not create an account, no further action is required.'));
    }

    /**
     * Get the verification URL for the given notifiable.
     *
     * @param  mixed  $notifiable
     * @return string
     */
    protected function verificationUrl($notifiable)
    {
        if (static::$createUrlCallback) {
            return call_user_func(static::$createUrlCallback, $notifiable);
        }

        return URL::temporarySignedRoute(
            'verification.verify',
            Carbon::now()->addMinutes(Config::get('auth.verification.expire', 60)),
            [
                'id' => $notifiable->getKey(),
                'hash' => sha1($notifiable->getEmailForVerification()),
            ]
        );
    }

    /**
     * Set a callback that should be used when creating the email verification URL.
     *
     * @param  \Closure  $callback
     * @return void
     */
    public static function createUrlUsing($callback)
    {
        static::$createUrlCallback = $callback;
    }

    /**
     * Set a callback that should be used when building the notification mail message.
     *
     * @param  \Closure  $callback
     * @return void
     */
    public static function toMailUsing($callback)
    {
        static::$toMailCallback = $callback;
    }
}
メールの内容
メールの内容は以下で指定している。Lang::getを使っているので、langファイルの中に内容を記述できます。
以下2つは同じ処理になります。
・Lang::get('ファイル名.オブジェクト名')
・__('ファイル名.オブジェクト名')
ファイル名.オブジェクト名.オブジェクト名,,,,のようにして欲しいデータを指定します。該当するデータがない場合はカッコの中身がそのまま表示されます。
    protected function buildMailMessage($url)
    {
        return (new MailMessage)
            ->subject(Lang::get('Verify Email Address'))
            ->line(Lang::get('Please click the button below to verify your email address.'))
            ->action(Lang::get('Verify Email Address'), $url)
            ->line(Lang::get('If you did not create an account, no further action is required.'));
    }
メールの送信
    public function toMail($notifiable)
    {
        $verificationUrl = $this->verificationUrl($notifiable);

        if (static::$toMailCallback) {
            return call_user_func(static::$toMailCallback, $notifiable, $verificationUrl);
        }

        return $this->buildMailMessage($verificationUrl);
    }
これらのファイルを一気に生成してくれる$ php artisan breeze:installはすごいです。


